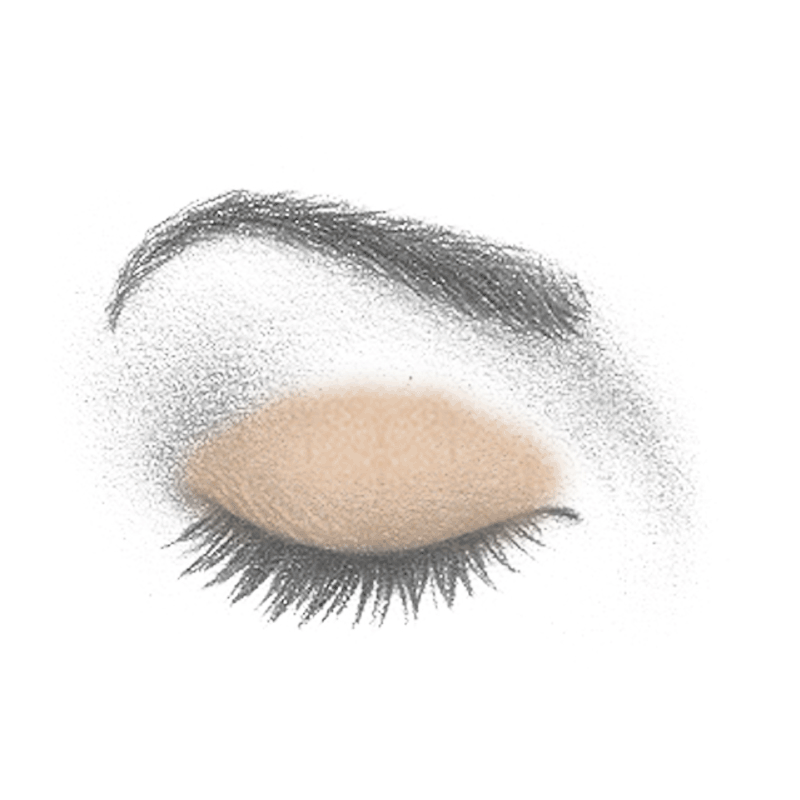
The Ultimate Guide to Applying Eyeshadow
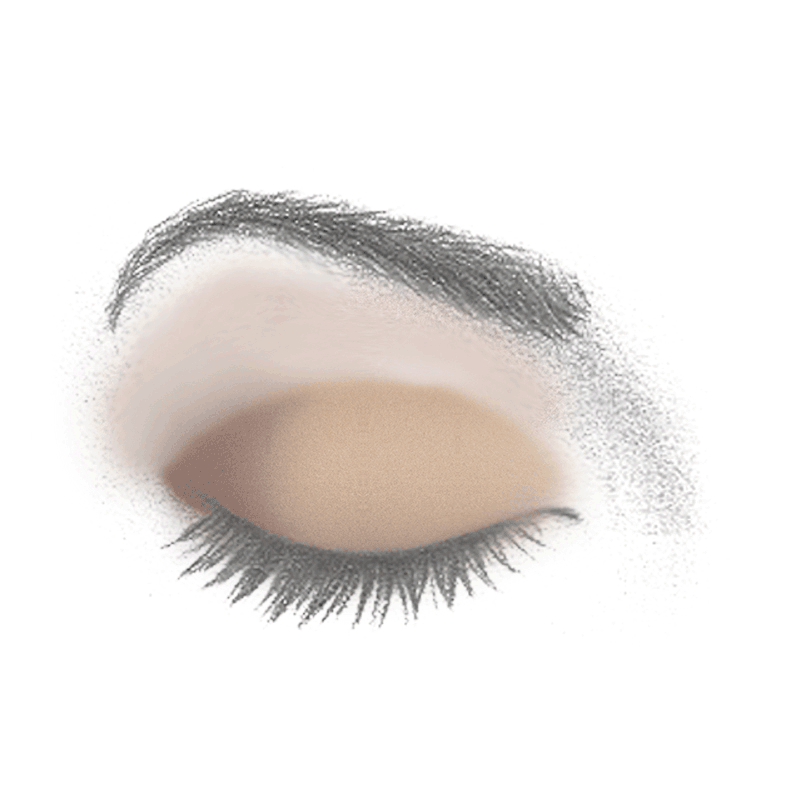
It's all about the eyes! Applying color, blending eyeshadow, and shaping your brows can have a huge effect on your look. Whether you're a beauty novice or a long-time makeup junkie, understanding the basics of applying eyeshadow the RIGHT way is incredibly important to your makeup routine.
The right eyeshadow application can have a natural-looking or beautiful dramatic effect on your overall look. On the flip side of that, eyeshadow applied the WRONG way can make your eyes look unnatural, distracting, and messy.
Learn the more about the basic eyeshadow brushes and exactly how to apply your shadow the RIGHT way below!
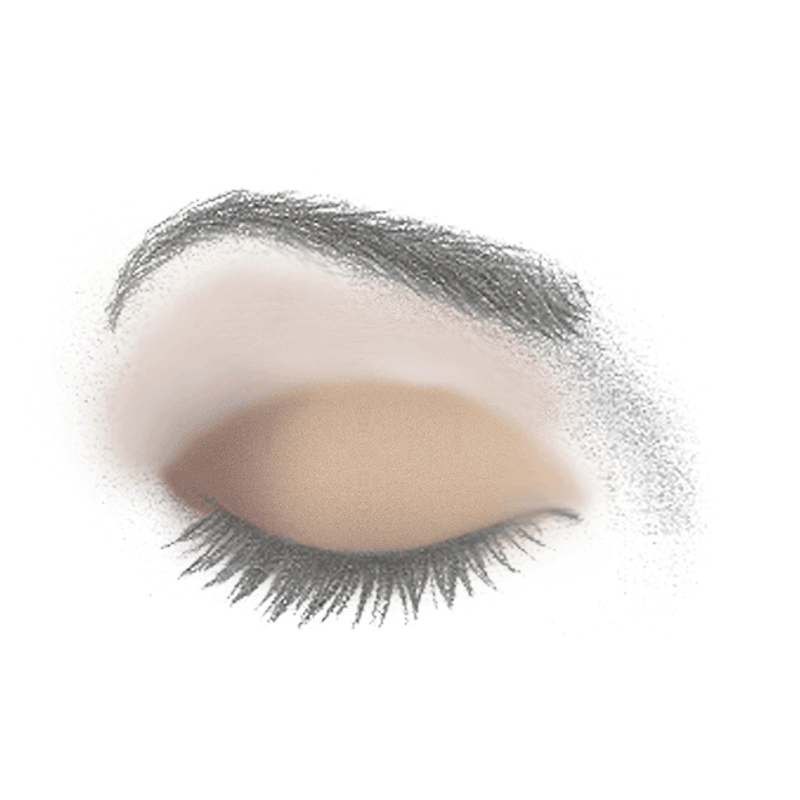
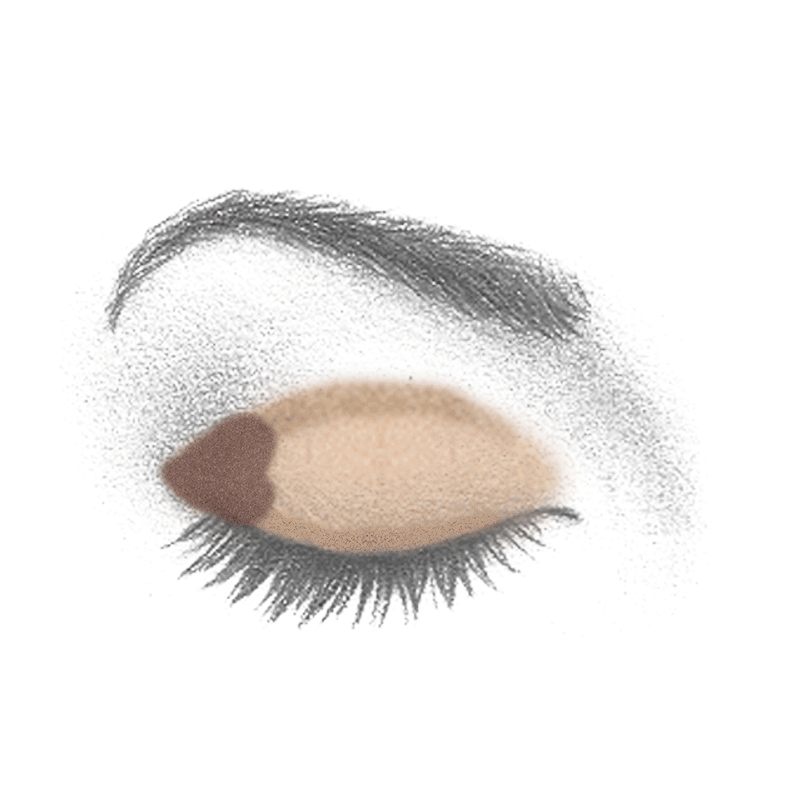
1) Base Color
To begin, use the Classic Shader to apply a medium-toned powder or cream eyeshadow by evenly patting the brush over your entire lid, starting from the inner corner of your eye (just above your tear duct) and working your way outwards. For a softer look, instead of patting the brush, use a sweeping motion with quick gentle strokes.
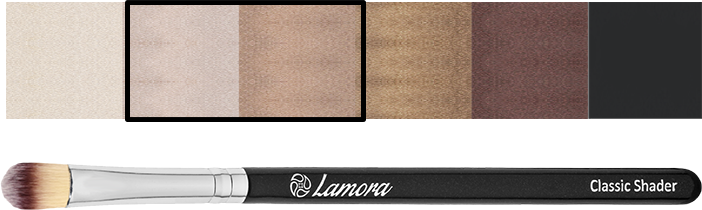
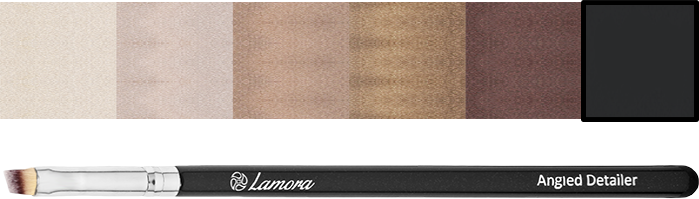
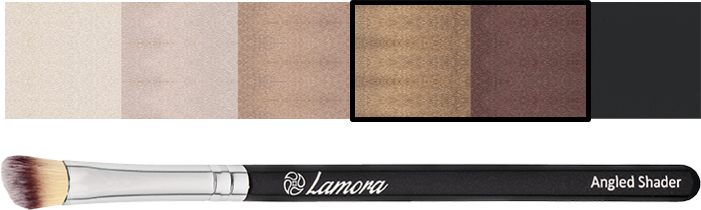
2) Transition/Crease Color
Use the angled shader brush to apply a medium-dark transition color to the crease of the eye by sweeping the brush inside of the socket line, starting just above the tear duct and lifting up as you approach the outer corner of the eye.
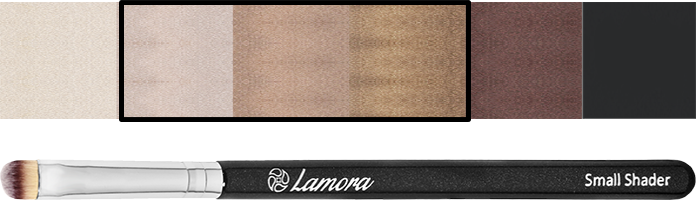
3) Lash Line Transition
Use the small shader brush to apply a medium-toned color by pressing product (working from the inner eye outwards) along the top or bottom lash line, then use to blend with light, circular, sweeping motions. For a lighter application, use a sweeping motion instead of pressing the product onto the skin.

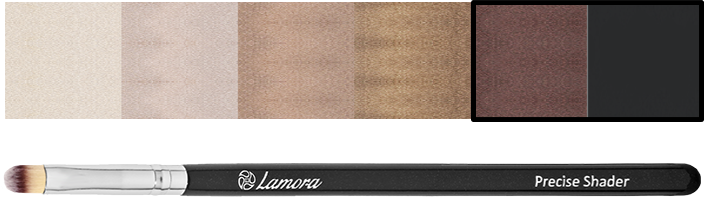
4) Corner
Use the precise shader to create a soft, smokey effect in the outer corner of the eye. Apply a darker pigment to the bristles, then pat the brush head onto the lid in a v-shape at the outer corner of the eye, or in the outer 3/4ths of the crease. Add in subtle sweeping motions (along with the patting motion) for a softer, blended look.

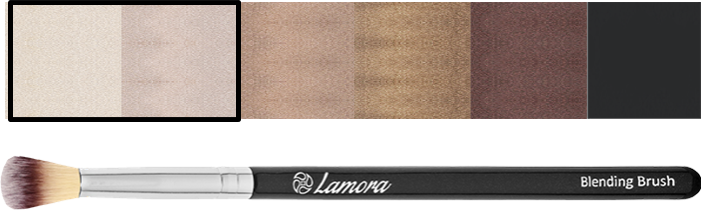
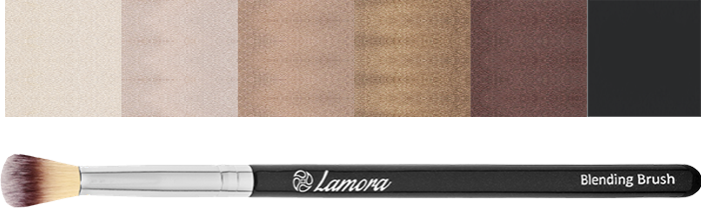
5) Upper Highlight
Use the blending brush to apply a light highlight above the crease of the eye. Lightly dust the shadow onto the area using long, sweeping motions, starting from just inside and above the tear duct and working outwards.
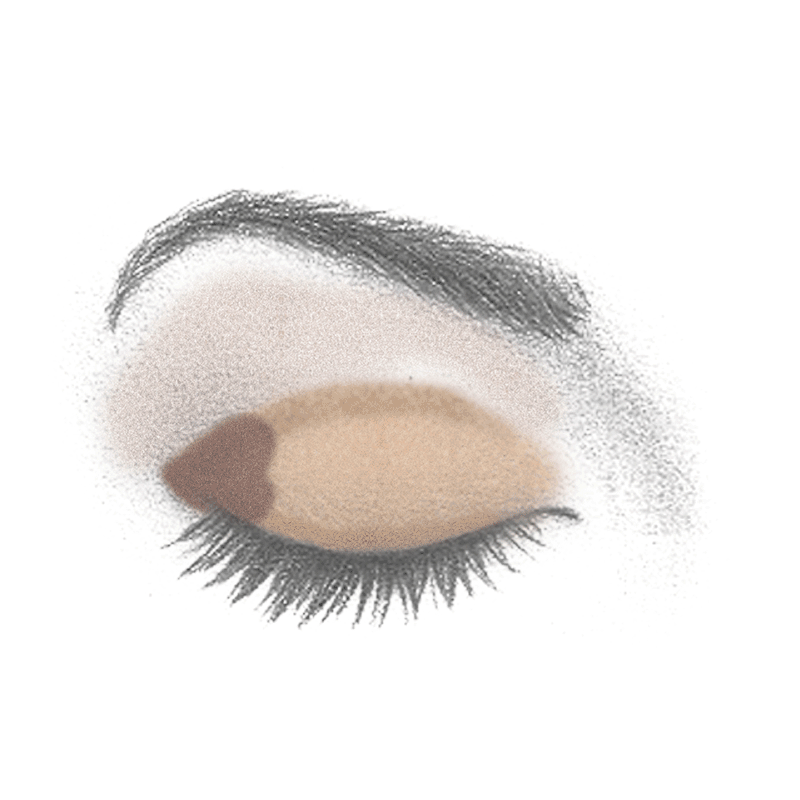
6) Blend
Tap off any excess product from the previous step, then use the same blending brush to diffuse the pigments and blend away lines for a smooth transition of color.
Working from the inner corner, work in small circles (making them larger as you move along your eye) to blend away lines, concentrating the darker colors on the outer corner of your eye.
7) Corner/Brow Highlight
Use the Detailed Pencil Brush to apply a highlight color just inside the inner crease of your eye and just below the arch of your brow to finish off the defining look.
For the inner corner, lightly pat the brush against your skin, then use small sweeping motions to blend the colors together.
Tap off any darker products you may have picked up, then apply the same color just below the brow line with long, sweeping motions, Use the same sweeping motion to blend the two highlight colors together.
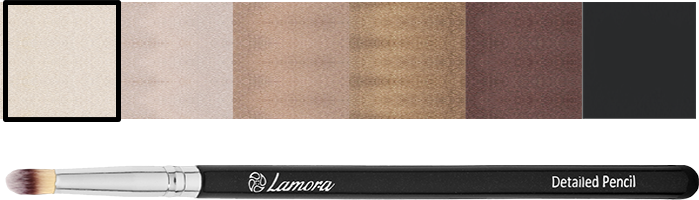
8) Eyeliner
To finish off the look, use the Angled Detailer to apply a gel or cream eyeliner just above your lash line.
Apply a small amount of product onto the tip of the brush, then carefully apply to the upper and lower lash line by patting the brush along the line. Then, use very small sweeping motions to blend out any lines that may have been created during application.
You can also use this brush to create defining lines, like wings or swirls.